
Last updated September 24, 2026
Attic Insulation Maintenance Checklist for Mountain View Homeowners
Blown cellulose settles roughly 20 percent in the first decade under normal conditions; add one rodent intrusion and compression can reach 40 percent, dropping a code-compliant R-38 installation to an effective R-22 without a single batt moving out of place. Most Mountain View homeowners have no idea what depth they started with, so the degradation is invisible until a contractor measures it. This checklist gives you a concrete, tool-minimal inspection routine tied to observable evidence rather than guesswork. You’ll learn how to check depth, spot moisture damage, distinguish rodent compression from normal settling, and document findings in a format a future buyer or appraiser can actually use.
Quick Answer
Attic insulation maintenance in Mountain View means checking insulation depth annually with a ruler and flashlight at three attic locations, looking for four specific moisture indicators, distinguishing rodent compression from normal settling, and logging results on a one-page form. For professional help with any issues you find, explore our Attic Insulation services. Do this after winter fog season, late summer, and before heating season begins. If depth has dropped more than 20 percent from original specification or you see moisture staining, call a professional - the fix is rarely “just add more” without first sealing air leaks.
Table of Contents
- Why Insulation Degrades Silently in Mountain View Attics
- The Three-Point Depth Check Protocol
- Four Visual Signs of Moisture Intrusion
- Rodent Compression vs. Normal Settling: How to Tell
- The Three Mountain View Seasonal Inspection Windows
- Your One-Page Annual Inspection Log
- Common Mistakes to Avoid
- When to Call a Professional
- Frequently Asked Questions
Why Insulation Degrades Silently in Mountain View Attics
Unlike a water heater, attic insulation doesn’t throw an error code. It sits in the dark, doing progressively less, while your PG&E bill drifts upward in increments small enough to blame on rate hikes. We’ve pulled back insulation in Mountain View homes - especially in neighborhoods like Old Mountain View, Monta Loma, and the Eichler tracts near Cuesta Drive - and found R-38 installations performing at R-18 or lower, sometimes for a decade or more.
Three forces drive this silent degradation in our climate:
- Settlement. Blown cellulose compacts under its own weight, losing loft and trapped air pockets. Fiberglass batts slump where they span wide joist bays. Either way, thermal resistance drops.
- Moisture cycling. Mountain View’s marine layer pushes humid air through ceiling penetrations on summer mornings. When that moisture hits cooler attic surfaces, it condenses, wetting insulation and accelerating compression. Winter fog season extends this risk from November through March.
- Pest activity. Roof rats and mice compress insulation while nesting, but they also tunnel through it, creating voids where conditioned air escapes directly into the attic. In the Bailey Park and Springer Road areas, we see this more frequently where mature landscaping provides roof access.
The result is a building envelope that passes visual inspection while failing performance tests. We’ve run blower-door tests - pressurization readings that show, in one number, how much conditioned air a home is losing - and found 3,500 CFM50 in houses that looked fine from the attic hatch. After proper air sealing and insulation restoration, those same homes dropped to 1,800 CFM50 or lower. The insulation wasn’t visibly damaged; it was just no longer doing its job.
This is why we treat air sealing as a hard prerequisite, not an upsell. Blowing new insulation over an unsealed attic floor is like pouring water into a cracked cup. At Envelope Insulation Co., we seal top plates, can lights, and penetrations before any insulation goes in, and we publish before-and-after blower-door numbers on every applicable job so homeowners can see the performance change they actually paid for. That’s been our practice since 2016, across 9,000+ homes.
The Three-Point Depth Check Protocol
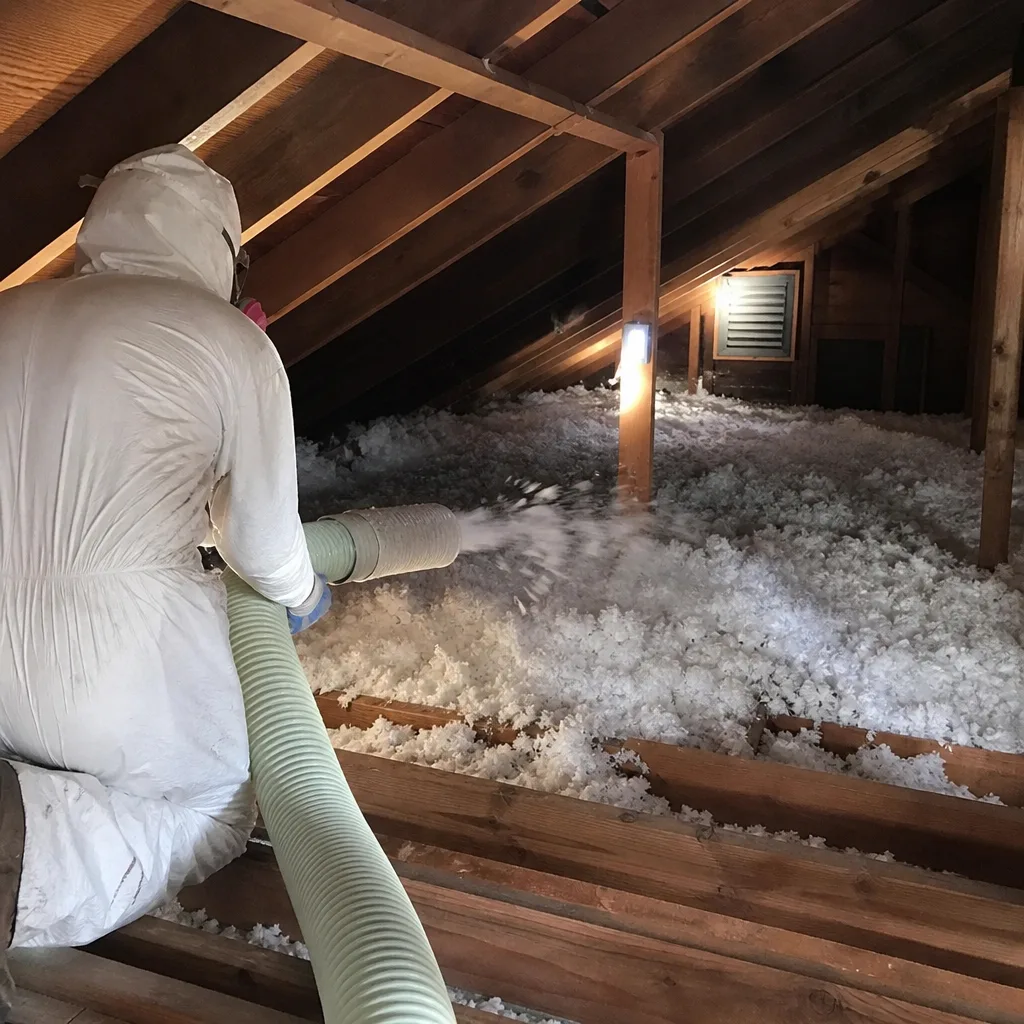
You need a ruler, a flashlight, and access to your attic. Wear a respirator if you have one; at minimum, an N95. Fiberglass and cellulose dust are not benign.
Check three locations every time:
- Center field. The middle of the attic, away from any walls or penetrations. This is your baseline - the least disturbed area, most representative of original installation depth.
- Eave edge. Where the attic floor meets the exterior wall top plate. Compression is worst here because installers have less room to maneuver, and wind washing (air movement from soffit vents) packs insulation against the edge over time.
- Directly above a top plate. The horizontal framing member where interior walls meet the ceiling. These are natural air leakage points, and insulation often gets disturbed during prior electrical or plumbing work.
Here’s what you’re measuring against. These are settled depths, not installed depths. If your original contractor specified R-38 blown cellulose at 12 inches installed, you should see roughly 10 inches after a decade of normal settling. Less than that indicates a problem.
| Target R-Value | Cellulose (settled minimum) | Fiberglass (settled minimum) |
|---|---|---|
| R-30 | 8.5 inches | 9.5 inches |
| R-38 | 10.5 inches | 12 inches |
| R-49 | 13.5 inches | 15.5 inches |
Measure to the top of the insulation layer, not compressed. For cellulose, fluff gently with a yardstick first. For fiberglass batts, measure the thickest point in the bay, not where it’s slumped between joists.
In Mountain View, R-38 is the current Title 24 minimum for attic insulation in new construction and major renovations, but many homes built before 2015 - especially the Eichlers and ranch-style homes in the 94040 and 94041 ZIP codes - were originally built to R-19 or R-30. If you’re unsure what you have, check your original building permit, assume R-19 for pre-2005 construction and R-30 for 2005-2015, or consult The Complete Guide to Insulation in Mountain View for deeper context on local requirements.
Document each reading with the date and location. A quarter-inch variance between center field and eave edge is normal. Two inches or more indicates wind washing or prior disturbance that needs attention.
Four Visual Signs of Moisture Intrusion
Mountain View’s climate creates a specific moisture risk profile. Summer marine layer brings 80%+ relative humidity on many mornings; winter fog extends the wet season. Attics that aren’t properly ventilated or air-sealed become condensation zones. Here’s what to look for:
1. Rust staining on truss plates. The metal gusset plates that join roof truss members will show orange-brown discoloration where repeated condensation has occurred. This is often your earliest warning sign, visible before insulation shows damage. Check plates near the ridge and above bathrooms - the two most common condensation points.
2. Matted cellulose at low points. Cellulose that has been wet and dried compacts into dense, gray-brown cakes that no longer fluff. You’ll find these in valleys of the attic floor, above ceiling penetrations, or near improperly flashed chimneys. The material may feel slightly stiff or crusty. This is not recoverable; it needs removal.
3. White efflorescence on blocking. The short vertical framing members between rafters - called blocking or dwangs - will show a powdery white deposit where moisture has carried salts out of the wood. This indicates repeated wet-dry cycles, usually from air leakage rather than roof leaks. The distinction matters: a roof leak requires a roofer, but efflorescence from air leakage requires air sealing.
4. Dark streaking on the underside of the roof deck. Look for gray-to-black discoloration following the grain of the plywood or OSB sheathing. This is mold or mildew growth, fed by consistent moisture. In Mountain View, we see this most often on north-facing roof slopes where morning marine layer moisture lingers longest, and above bathrooms where exhaust fans vent into the attic rather than through the roof.
If you find any of these four signs, do not add insulation on top. Moisture trapped between layers will accelerate degradation and potentially damage the roof deck. The correct sequence is: identify the moisture source, repair it, remove damaged insulation, air seal, then reinstall. This is why our crews begin every job with a written scope that specifies moisture remediation before insulation work - it’s Haven Standard Clause 1 in practice.
Rodent Compression vs. Normal Settling: How to Tell
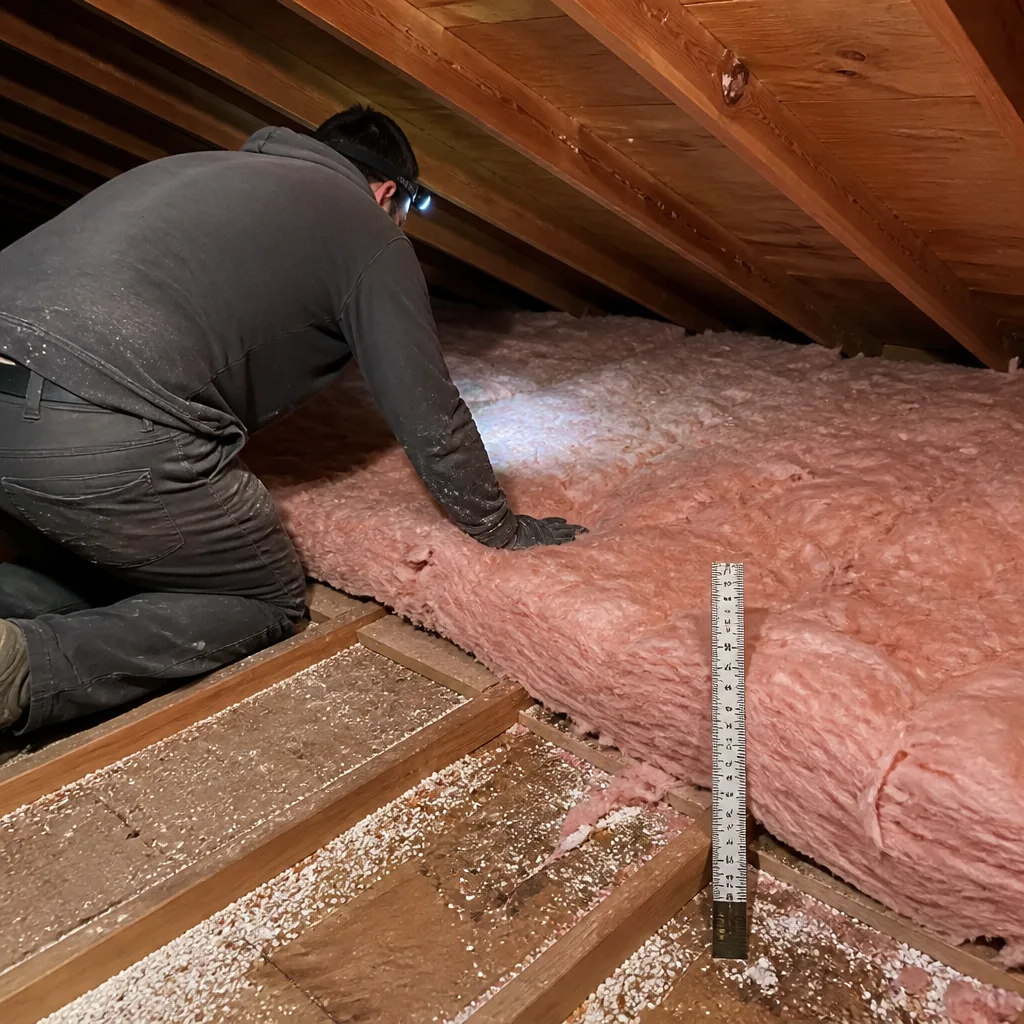
Not all compression is equal. Normal settling is gradual, relatively uniform, and expected. Rodent compression is localized, irregular, and requires remediation before any topping off.
Normal settling looks like this: The attic floor shows a consistent, slightly undulating surface. Depth varies by an inch or two across the space, but the variation follows no pattern. The insulation material itself looks intact - individual cellulose fibers or fiberglass batts are recognizable, just compressed. There’s no odor beyond the faint paper or resin smell of the material itself.
Rodent compression looks like this: You’ll find distinct tunnel paths, 2-4 inches wide, where insulation has been packed down or completely removed. These run along joists, near wires, or between the attic and wall cavities. Look for:
- Scattered droppings, typically rice-grain sized and dark, often along tunnel paths
- Insulation packed into irregular mounds where rodents have nested - these can be 6-12 inches across and noticeably denser than surrounding material
- Gnaw marks on wood, wiring insulation, or PVC vent pipes
- A distinct ammonia odor, especially in enclosed areas near the eaves
- Grease marks (dark smudges from fur oils) along frequently traveled routes
In Mountain View, roof rat activity peaks in late summer and early fall when mature fruit trees - common in the older neighborhoods near downtown - drop their crop. We’ve found active infestations in attics above Castro Street corridor homes where rats accessed via overhead utility lines or mature oak canopies.
The critical distinction: normal settling can be corrected by adding insulation after air sealing. Rodent compression requires removal of contaminated material, sanitization of the attic floor, rodent proofing of entry points, and then fresh installation. Blowing new insulation over rodent-contaminated material traps odors, pathogens, and pheromones that attract future infestations - a risk we cover in DIY vs Professional Insulation: The Mountain View Homeowner’s Decision Guide. We won’t do it, and any contractor who will is cutting a corner you’ll pay for later.
Our crews document rodent damage with photos as part of the standard Documented Photo Record on every visit. If you’re doing this inspection yourself, take dated photos of any suspected rodent compression before disturbing it. These will be useful for pest control professionals and for insurance documentation if damage is extensive.
The Three Mountain View Seasonal Inspection Windows
Timing matters. An attic inspection in the wrong season can miss active problems or mistake seasonal conditions for damage.
Window 1: March-April, post-winter fog season. This is your moisture check. By late March, the heaviest fog has passed, and any condensation damage from the winter will be visible but not yet dried beyond recognition. Look for the four moisture signs described above. Check bathroom exhaust fan terminations - we find disconnected or attic-vented ducts in roughly 15 percent of Mountain View homes this age, and winter fog makes the resulting moisture obvious. This is also when rodent nesting material is freshest and most visible, before summer heat desiccates it.
Window 2: August-September, late summer. This is your pest activity check. Roof rats are most active now, and their damage is recent enough to trace. Fruit drop from backyard trees peaks in August; rat pathways to rooflines are often visible from the ground if you know to look. In the attic, fresh droppings will be dark and soft, not the gray, crumbly pellets of older deposits. This is also the best time to verify ventilation - on a 90-degree day, your attic should not exceed 130°F. Higher temperatures indicate blocked soffit vents, inadequate ridge venting, or both, all of which accelerate insulation degradation.
Window 3: October-November, pre-heating season. This is your performance verification check. Run your heating system for 30 minutes, then feel the ceiling in rooms below the attic. Cold spots indicate insulation voids or air leakage paths that will cost you all winter. Check your PG&E bill against the same month last year - a 10% increase without rate changes or occupancy changes suggests envelope degradation. This is also the ideal time to schedule professional work if your inspection found issues; crews have more availability before winter demand peaks, and materials like spray foam insulation in Mountain View cure more predictably in moderate temperatures.
We recommend a full inspection during at least one window annually, with a quick depth check in the others. The one-page log described below makes this routine sustainable.
Your One-Page Annual Inspection Log
Documentation protects your investment and simplifies future transactions. A future buyer’s inspector will ask about insulation age, type, and condition. An appraiser may need to verify R-value for energy-efficient mortgage products. Having a written record with photos beats memory every time.
Here’s the format we recommend, condensed to one page:
Property Information (top section)
- Address
- Year built
- Original insulation type and rated R-value (from permit or prior contractor documentation)
- Attic square footage
- Ventilation type (soffit/ridge, gable, powered, etc.)
Annual Inspection Record (repeated table, one row per year)
| Date | Inspector | Center Depth | Eave Depth | Top Plate Depth | Moisture Signs (Y/N + notes) | Rodent Evidence (Y/N + notes) | Photos Taken (Y/N) | Follow-up Needed |
|---|
Professional Service Record (bottom section)
- Date of service
- Contractor name and license number
- Work performed
- Final blower-door reading (if applicable)
- Warranty expiration
Attach this log to your home’s permanent records, with inspection photos stored in dated folders. If you sell, this documentation demonstrates maintenance diligence and can preempt inspection objections.
For homeowners who want professional documentation without the DIY inspection, our attic insulation in Mountain View service includes the full Documented Photo Record on every visit, plus before-and-after blower-door numbers on air-sealing jobs. The written scope and written warranty are delivered before anyone lifts a tool - Haven Standard Clause 1, always.
Common Mistakes to Avoid
- Measuring only at the attic hatch. The hatch area is the most disturbed, most frequently inspected, and least representative location. Depth here is almost always lower than center field due to foot traffic and air leakage around the hatch itself. Measure your three points every time.
- Adding insulation over moisture-damaged material. We’ve removed installations where three layers of cellulose were stacked over a decade, each trapping moisture from the layer below. The bottom layer was black with mold. The homeowner saved nothing; remediation cost tripled what proper sequencing would have.
- Ignoring can lights and top plates. In Mountain View’s Eichler and ranch homes, recessed can lights are common ceiling features and major air leakage points. Covering them with insulation without proper airtight enclosures creates a fire hazard and moisture trap. Air seal first, then insulate.
- Assuming “more is better” without air sealing. An attic with 18 inches of insulation and 3,000 CFM50 of air leakage performs worse than an attic with 10 inches and 1,500 CFM50. The insulation can’t do its job if conditioned air is streaming past it. This is why we publish blower-door numbers - the proof is in the pressurization reading.
- Using a shop vac on fiberglass or cellulose dust. Standard vacuums expel fine particles through the exhaust. If you’re cleaning up small areas of disturbed insulation, use a HEPA-filtered vacuum or damp-wipe surfaces. Better yet, leave removal to crews with proper containment and respiratory protection.
- Skipping the fall pre-heating check. Many Mountain View homeowners only think about insulation when they’re uncomfortable. By then, you’re competing for contractor availability with everyone else. The October-November window lets you schedule at your preference, not in urgency.
- Not documenting prior work. Without a written record, you can’t prove what you have to a buyer, an appraiser, or even yourself five years later. The one-page log takes 10 minutes annually and pays for itself in transaction clarity.
When to Call a Professional
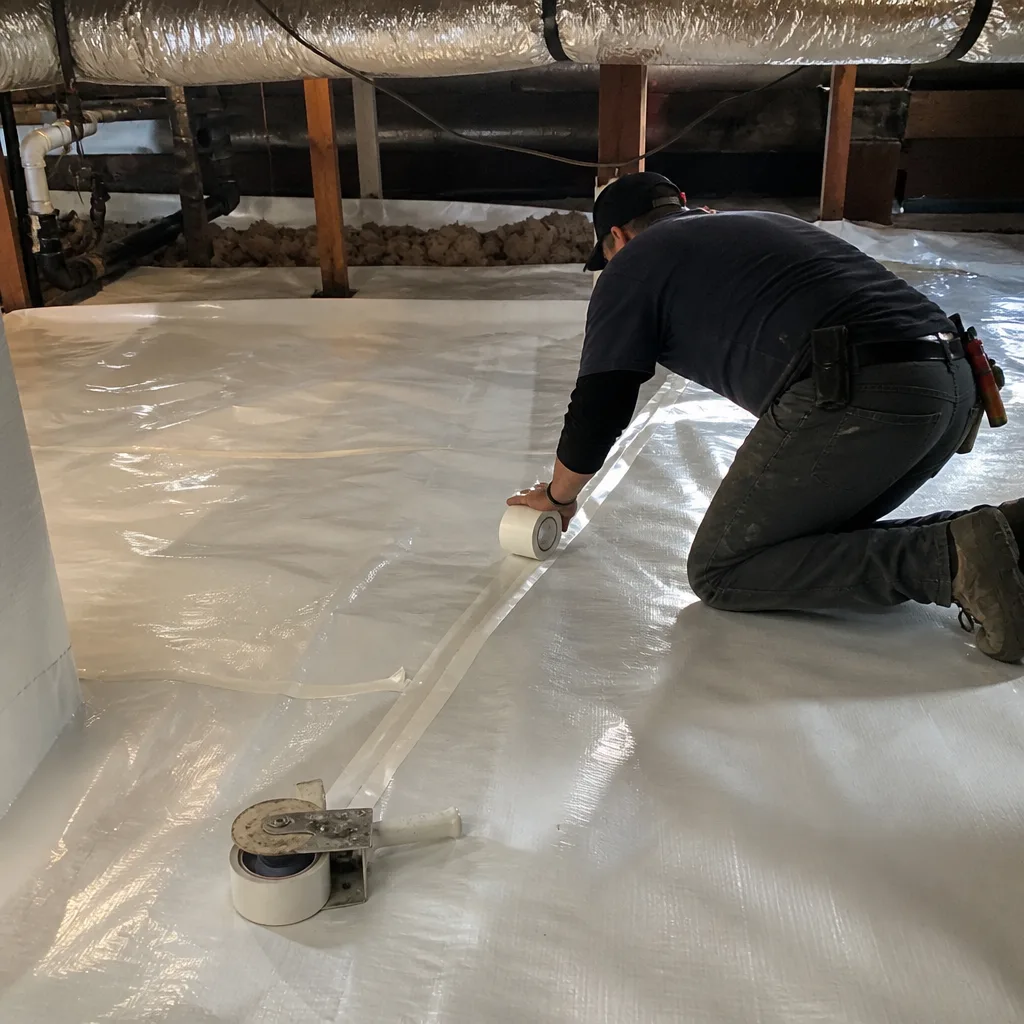
Call a contractor when your inspection reveals depth loss beyond 20 percent of original specification, any moisture damage, or rodent evidence. These conditions rarely resolve with homeowner intervention, and the wrong response - adding insulation over problems, sealing moisture in, or partial rodent cleanup - typically makes remediation more expensive.
Also call if your blower-door reading (from a prior energy audit) exceeds 2,500 CFM50 for a home under 2,500 square feet, or if you experience persistent cold spots, ice damming (rare but possible in Mountain View’s microclimates), or PG&E bills that trend upward without explanation.
Topside Attic Insulation Mountain View home offers free estimates in Mountain View. We’ll inspect your attic, measure current performance, and provide a written scope and written price before any work starts - no exceptions since 2016. Our crews are background-checked and uniformed, and a live person answers calls 24/7 at (669) 259-0406. We also offer a Free Second Opinion on any written estimate; bring us a competing quote and we’ll read it with you.
Frequently Asked Questions
Professional attic inspection and assessment in Mountain View typically runs $150-$300, though we waive this fee when you proceed with recommended work. If remediation is needed, most attic insulation restoration jobs in a home this size run between $2,800 and $6,500 depending on square footage, existing material condition, and whether air sealing is required. We provide a written price before any work starts - call (669) 259-0406 for an exact quote; estimates are free.
Only if the existing material is dry, uncontaminated, and the attic floor has been properly air sealed. In our experience across Mountain View, fewer than 30 percent of attics meet all three conditions without some remediation first. Blowing new cellulose or fiberglass over damp or rodent-compacted material traps problems and accelerates degradation. We inspect first, document conditions with photos, and specify exactly what needs to happen in what sequence.
A full inspection once per year during one of the three seasonal windows described above, with a quick depth check during the other two. Homes with mature trees nearby, prior rodent activity, or bathrooms venting into the attic should inspect twice yearly. The entire routine takes 30-45 minutes once you know what to look for.
Cellulose (recycled paper, treated with borate for fire and pest resistance) settles more initially but provides better resistance to air movement when properly dense-packed. Fiberglass (spun glass fibers) maintains loft longer but is more easily disturbed by wind washing and pests. In Mountain View’s marine layer climate, we often recommend cellulose for its moisture-buffering properties, or hybrid systems with spray foam air sealing and blown fiberglass or cellulose on top. Materials from Owens Corning, Johns Manville, and GreenFiber are all options we specify based on the specific job conditions, not proprietary lock-in.
Repair - meaning spot-addition over intact existing material - is cheaper only when the existing insulation is truly intact: dry, uncompressed, pest-free, and the attic floor is already air sealed. If any of those conditions fail, repair becomes false economy. We’ve removed “repaired” attics where three spot additions over a decade created a stratified mess requiring full removal at 2-3x the cost of proper replacement initially. The inspection protocol in this guide tells you which situation you’re in.
For straightforward depth replenishment on a sealed, clean attic floor, yes. For moisture-damaged or rodent-contaminated attics, no - proper remediation requires scheduled sequencing: moisture source repair, contaminated material removal, sanitization, drying period, air sealing, then insulation installation. Rushing this sequence is how moisture gets trapped and mold grows. We provide a written timeline with the written scope so you know exactly what happens when.
The Bottom Line
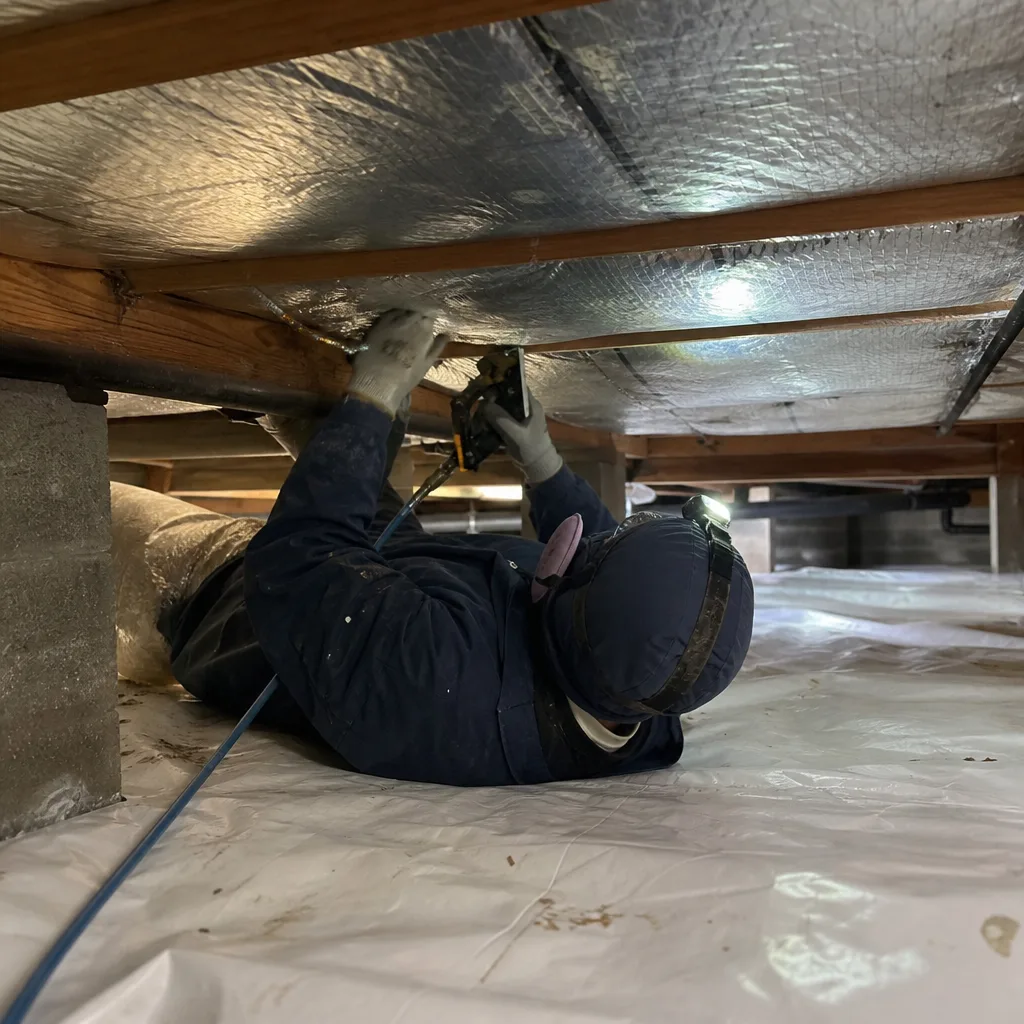
Attic insulation maintenance is not about perfection; it’s about catching degradation before it becomes expensive remediation. The three-point depth check, four moisture indicators, and rodent-versus-settling distinction give Mountain View homeowners observable criteria instead of guesswork. Inspect during the three seasonal windows, log your findings, and act on problems in the correct sequence - air seal first, then insulate. For additional help, browse more guides & resources on attic care and energy efficiency. The documentation you build protects your comfort, your energy costs, and your home’s transaction value. If your inspection reveals issues beyond homeowner scope, we’re available for free estimates with written prices before any work starts, backed by the 365-Day Done Right Promise and the Haven Standard we’ve operated under since 2016.
Written by Wes Okafor, Owner at Topside Attic Insulation Mountain View, serving Mountain View since 2016.